 |
 |
|
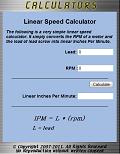
Lead Screws: Selection ProcessThe task of selecting lead screws can often be confusing because the many variables involved. Lead, rpm, critical speed, diameter, columns strength, and efficiency all depend on one another in some form. So how do you choose a lead screw to meet your needs? The following section will guide you through the steps of choosing a lead screw. This is an accepted way of narrowing and choosing a lead screw in many industries. Although recommended, you do not have to follow the steps in order described, but always complete each step before deciding on the lead screw. Keep in mind that these steps will have to be performed for each axis utilizing a lead screw system . Also keep in mind that you may have to revisit this section after the motor selection. Lead screw selection and motor selection really go hand in hand, but it usually works best to understand CNC drive parts first. Requirements before Proceeding (covered in proceeding sections)-Known or estimated weight of assembly to be moved by the lead screw -Desired linear velocity of assembly (IPM) -Desired time to reach velocity (acceleration) -Total span of lead screw -End Fixity type -Linear Bearing type (ball bearing, sliding bearing) Step 1: Determining the forces acting on the lead screw Step one involves determining the loads on the lead screw by using the weight of the assembly to be moved by the lead screw, the linear bearing type, the velocity, and the desired acceleration. It is important to know what kind of loads will be applied to the lead screw to check for column strength issues. Also, you will be able to use these loads with you lead screw selection to calculate required torque. Click here to read how to read how to calculate these forces manually. OrUse the lead screw forces calculator here. Step 2: Find Minimum Diameter of Lead Screw The next step involves finding the minimal diameter of a lead screw given the maximum distance between the nut and the farthest end bearing, the maximum load, end fixity type, and the slender ratio. The slender ratio is the ratio of the minor diameter of a lead screw to the lead screw length. A lead screw may only be so long in respect to the diameter before failure is imminent. Use this calculator to find the smallest diameter lead screw that will work for your application. Use the total load that was calculated above. It should be noted that this calculator will provide the absolute smallest minor diameter of a lead screw that will be safe given the span and end fixity type. You will need to find the closest fractional size offered by your desired manufacturer. You may also use the column strength calculator if you have preselected a diameter and span and need to check if the column strength is more than the applied load. Step 3: Selecting Lead Above we selected a lead screw that is as close to the minimal diameter that was calculated. Now we must select the lead screws lead. Here is where things get a little trick and may take a few iterations. Because changing the lead affects the linear resolution and the force output of the drive, you may need to revisit this section after finalizing your motor selection. For now, here is the recommended approach. First see what leads are available in the diameter selected. Dont forget to check lead screw nut availability and choose one (higher leads are usually better. Next: Use the Linear speed calculator to see how many RPM the screw must do to achieve the desired linear speed.
Now that you used the Linear speed calculator to see the maximum RPM, use that RPM value to place into the critical speed calculator below. Use the Critical Speed calculator to check see if the given lead screws diameter and length allows for sufficient RPM of the lead screw. If the critical speed is higher than the operational RPM, choose a larger diameter, shorten the lead screw, or choose a higher lead. Step 5: Re-iterate through the stepsRun through these steps a few times to try and choose the best solution for your router. Often times we must compromise on what we want to meet our budget or what is available. However, use these tools to help make sense of all the numbers. Play around with end fixity type, diameter, lead, and other attributes to see how it changes the cost of your setup. You can often trade attributes and still reach a similar outcome. Return To the CNC Drive Section |
The Builder's Guide
 Calculators
 CNC Controllers
 |
|
|
[?] Subscribe To This Site
Page Missing?Please bare with us as we upload pages. The website is still under contruction and new content is being added. To see the most recent pages, visit the website blog. Thank you! |
||
|
|
Homepage |
Buyer's Guide |
Builder's Guide |
Contact Us|
© Copyright 2007-2011. |
||
|
|
||


